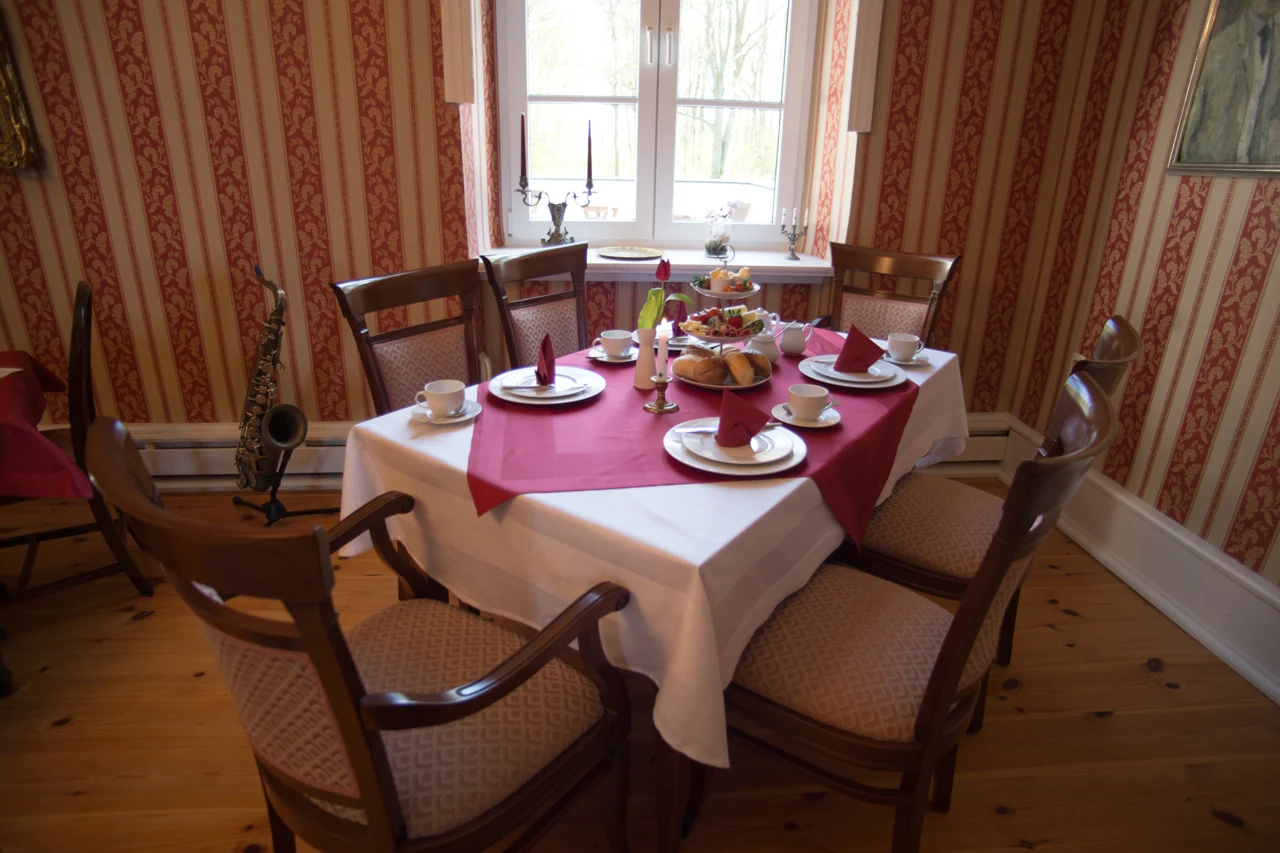
From above, two generous cloths may seem to make the same decision: cover the table. From an end chair, their edges can tell a different story. This original dimensional example places hypothetical 70-by-90-inch and 70-by-108-inch rectangles over the same 60-by-36-inch rectangular tabletop. The width stays fixed while the length changes. The resulting comparison concerns where extra material is allocated, rather than a promise about how a purchased fabric will drape.
Fix the tabletop and center each cloth
Williams Sonoma's tablecloth FAQ starts with the table's shape and measurements, then asks how much overhang is wanted. Apply that vocabulary to an invented rectangular table measuring 60 inches along its length and 36 across its width. Place each invented cloth with its longer dimension along the table's 60-inch direction.
For this geometry, the cloth is centered equally at both ends and along both sides. Neither rectangle is rotated diagonally, shifted to one end or gathered into folds on the tabletop. Those assumptions matter: a different placement would distribute the excess differently even if the package dimensions stayed the same.
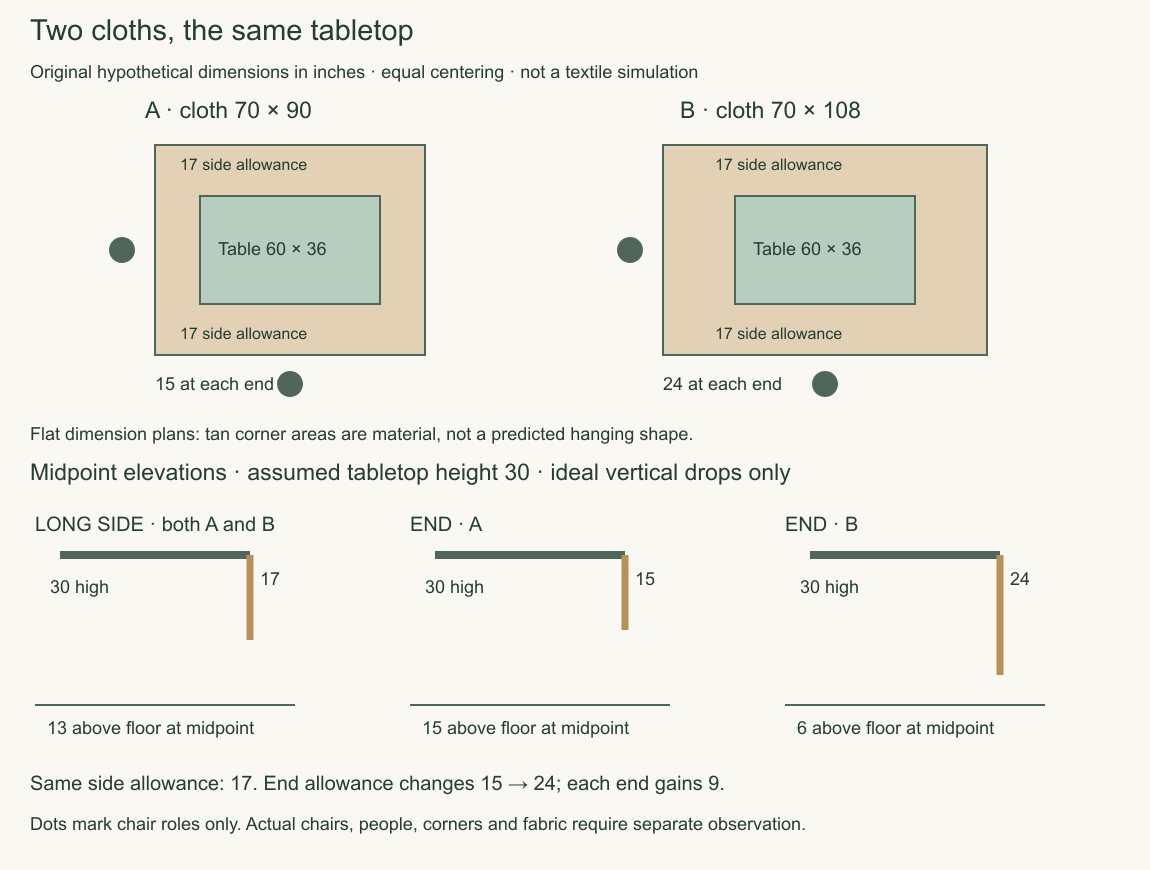
Both cloths are 70 inches wide. Subtract the table's 36-inch width to leave 34 inches of extra width. Divide by two to get 17 inches beyond each long side. In this centered dimensional plan, the longer cloth adds nothing to that side allowance. A person seated halfway along a long side therefore has the same nominal midpoint allowance in both versions.
Calculate the ends separately
Cloth A is 90 inches long. Subtract the table's 60-inch length: 30 inches remain, split equally into 15 inches at each end. Cloth B is 108 inches long. Its extra length is 48 inches, giving 24 inches at each end. Each end gains nine inches, while each long side keeps its 17-inch allowance.
The eighteen-inch difference between the two complete cloth lengths is not an eighteen-inch increase at a single chair. Equal centering divides it between two ends. Likewise, the word “longer” does not imply a greater drop on every edge. Keeping the directions named is what makes the arithmetic useful before choosing between two sizes.
The original top views show the same tabletop inside the two flat dimensional envelopes. They are dimension plans: the outer outline records how much rectangle exists beyond each table edge. They do not depict fabric hovering horizontally beside an installed table, nor do they predict the shape of a hanging corner.
Look from a side chair and an end chair
Now add a second declared assumption: the tabletop is 30 inches above the floor. In the simplified side elevations, material at the midpoint of an edge hangs vertically without stretching or being caught on anything. At a long-side midpoint, 30 minus 17 leaves an edge 13 inches above the floor in both versions.
At an end midpoint, Cloth A leaves 30 minus 15, or 15 inches above the floor. Cloth B leaves 30 minus 24, or six inches. These are calculated positions in the simplified drawing. They are not a maker's hanging dimensions, a clearance standard or evidence that an actual cloth stops precisely at those heights.
Mark a side chair and an end chair on the room sketch to remember whose view changes. The end-chair position is where this added length becomes apparent. Do not use a generic chair silhouette as a measurement of someone's knees, legs, mobility aid or preferred sitting position. An actual arrangement needs the actual chairs and the needs of the people using them.
Leave the corners out of the midpoint claim
A rectangle has excess material beyond both directions at a corner. That corner cannot be described simply by repeating the 17-inch side figure or the 24-inch end figure. The dimensional plan deliberately keeps its corner areas visible so they do not disappear from the decision.
How a real corner folds, gathers or hangs depends on the actual cloth and placement. This article has not modeled a three-dimensional textile or tested a material. Do not turn the six-inch end-midpoint result into a claim that every point on Cloth B remains six inches above the floor.
Before committing to a size for an event, compare the real table and intended cloth information, then examine the actual arrangement when possible. Look at corners as well as edge midpoints, with chairs in their intended positions. Do not pull a cloth around a seated person to make it resemble the diagram. The drawing is a way to ask a better fit question, not a substitute for observing the real setup.
Choose the dimension that addresses the intended change
Suppose the fictional host wants more coverage at the table ends but is content with the current side allowance. Cloth B directs its added length exactly to that stated visual difference in the centered model. If the host instead wants more side coverage, changing 90 to 108 while keeping the width at 70 does not address the request.
A useful enquiry to a seller or rental provider can name the actual tabletop length, width and height, the intended centered orientation and the desired appearance from both chair positions. Include actual product dimensions and any material information the provider supplies. Avoid describing an invented 70-by-108 rectangle as a verified stocked item.
The choice may be the shorter cloth, the longer one, another size or an existing cloth placed differently. What matters is that the decision follows the dimension being changed. An overhead photograph alone cannot show all the consequences of adding fabric at the ends.
Sources & further reading
Published sources for the details and examples discussed in this story.