Three parallel pencil lines are enough for a small stitching exercise. Keep the fabric, thread and marked path the same, then change the relationship between the visible stitch and the gap beside it. The result gives you something specific to compare: a closely interrupted line, a longer dash and a more widely separated mark. The sampler below is an original spacing plan built around running stitch. Its first row follows the Royal School of Needlework's description of equally sized surface stitches at regular intervals; the other two rows deliberately change one dimension. The drawings are construction diagrams, not photographs of a finished or tested piece.
Prepare a small, ordinary piece of cloth
Choose a plain woven cotton scrap about 6 inches square, embroidery thread, a hand-sewing or embroidery needle suited to that thread, scissors, a ruler and a soft pencil. Pick a thread color you can see clearly against the cloth. An existing scrap is useful here because the comparison does not depend on an expensive fabric, a printed motif or a large embroidery kit.
Thread a manageable length, around 16 inches, through a needle that accepts it without forcing. Use the same thread thickness throughout the three rows. If you separate a stranded embroidery thread, keep that chosen strand count constant too. This makes spacing the intended variable instead of changing spacing, thickness and color together.
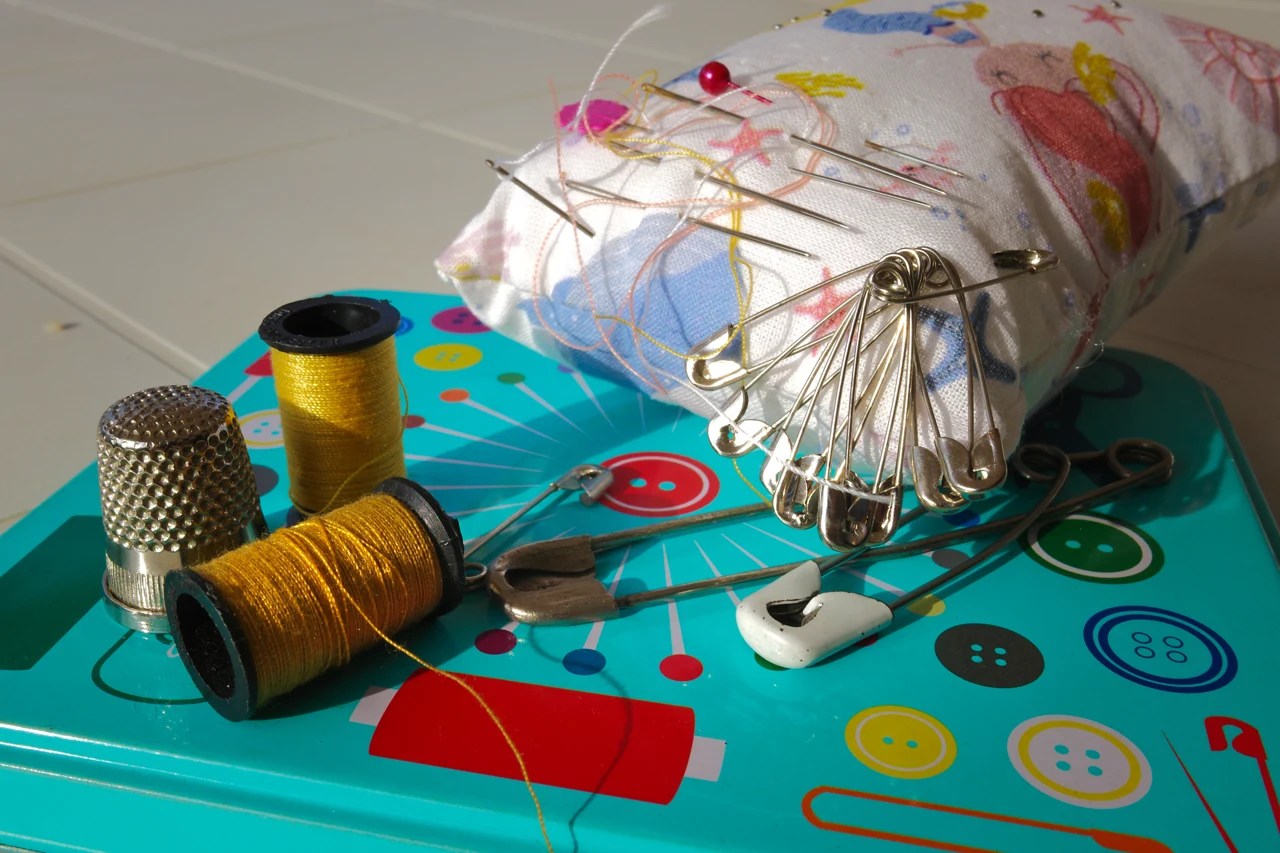
On the cloth, mark three light parallel guide lines, each 72 millimeters long and about 20 millimeters apart. Label them A, B and C outside the stitching area. These are practice marks on a scrap; a soft pencil is not being recommended as a removable marking system for a finished garment. Keep the needle in a pincushion when it is not in your hand.
Work row A: three millimeters visible, three between
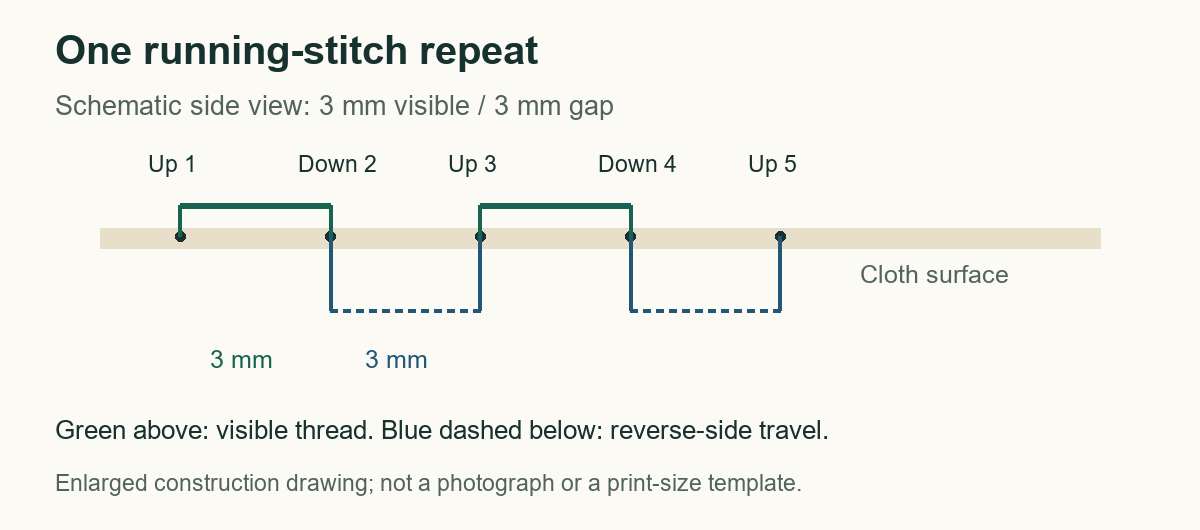
Make a small knot in the thread end for this practice piece. Bring the needle from the back of the cloth to the front at the start of line A. Put it down 3 millimeters along the line and pull the thread through gently. That first section on the front is the visible stitch.
From the back, bring the needle up another 3 millimeters farther along the guide. The thread has traveled beneath the cloth across the gap. Put the needle down 3 millimeters after that rise, creating the next visible stitch. Continue the same sequence: 3 millimeters visible on top, then 3 millimeters of travel below before the next rise.
The RSN method emphasizes regular surface stitches and equally spaced work underneath. For this exercise, estimate carefully or make small ruler marks before stitching. Pull only until the thread lies against the cloth; do not tighten it into a cord that gathers the fabric. Stop after the last complete visible stitch that fits inside the guide, with the needle at the back. There will be a small unused space before the end mark.
Change one spacing choice in each remaining row
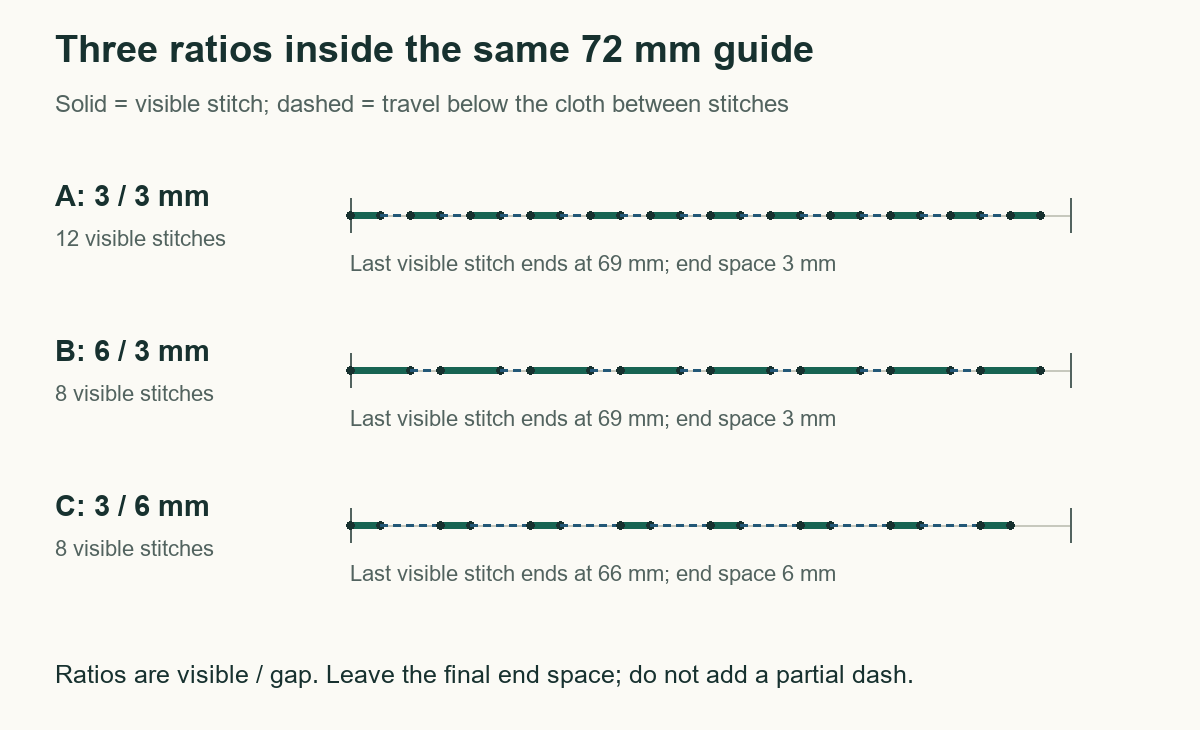
For row B, keep the gap at 3 millimeters but make each visible stitch 6 millimeters long. The sequence is therefore 6 millimeters on the front and 3 below before the next rise. Begin at the start mark and stop after the final complete visible stitch, as before. Compare the longer uninterrupted portions with row A while the thread and cloth stay unchanged.
For row C, return to a 3-millimeter visible stitch and lengthen the gap to 6 millimeters. The sequence becomes 3 millimeters on the front and 6 below. This produces fewer visible marks within the same guide zone. It is a deliberate variation from the equal stitch-and-gap baseline, rather than an attempt to hide uneven work.
Across a 72-millimeter zone, the plan allows twelve complete visible stitches in A and eight in each of B and C. The last visible stitch ends at 69 millimeters in A and B, and at 66 millimeters in C. Leave those different end spaces instead of adding a shortened dash to force every row to touch the endpoint. The marked path stays fixed while the spacing pattern remains intact.
Look at the line, then turn the cloth over
Put the sampler flat and compare it from the same viewing distance. In the drawing, B has longer visible dashes than A, while C gives each short dash a larger space around it. Decide which relationship interests you for another practice line. There is no need to rank the rows as beginner, improved and best; they answer different spacing choices.
Turn the cloth over and follow the thread between the holes. A long gap on the front corresponds to a longer route on the reverse between one stitch and the next. If a row has an unexpected large blank, check the actual entry and exit points. That makes the correction specific instead of pulling the whole row tighter in the hope that tension will change its pattern.
If the cloth puckers, pause before continuing. Ease excess tension gently where possible; if a section will not relax, undo that short section and work it again with less pull. The intended comparison needs the cloth to lie reasonably flat. A gathered line introduces a different effect from the spacing study marked on the scrap.
Finish the practice piece with its measurements intact
With the needle at the back, secure the end using a small knot close to the cloth and trim the remaining thread without cutting the fabric. Repeat for the other rows. Label the ratios beside them: A 3/3, B 6/3 and C 3/6, with “visible/gap, millimeters” written once so the numbers retain their meaning.
Keep the scrap with a short note about the next comparison you want. You might repeat B in another color while preserving its spacing, or draw a curve before choosing how to follow it. That next exercise can change a different variable; this one has already done a useful job when the three straight rows remain easy to identify.
Sources & further reading
Published sources for the details and examples discussed in this story.